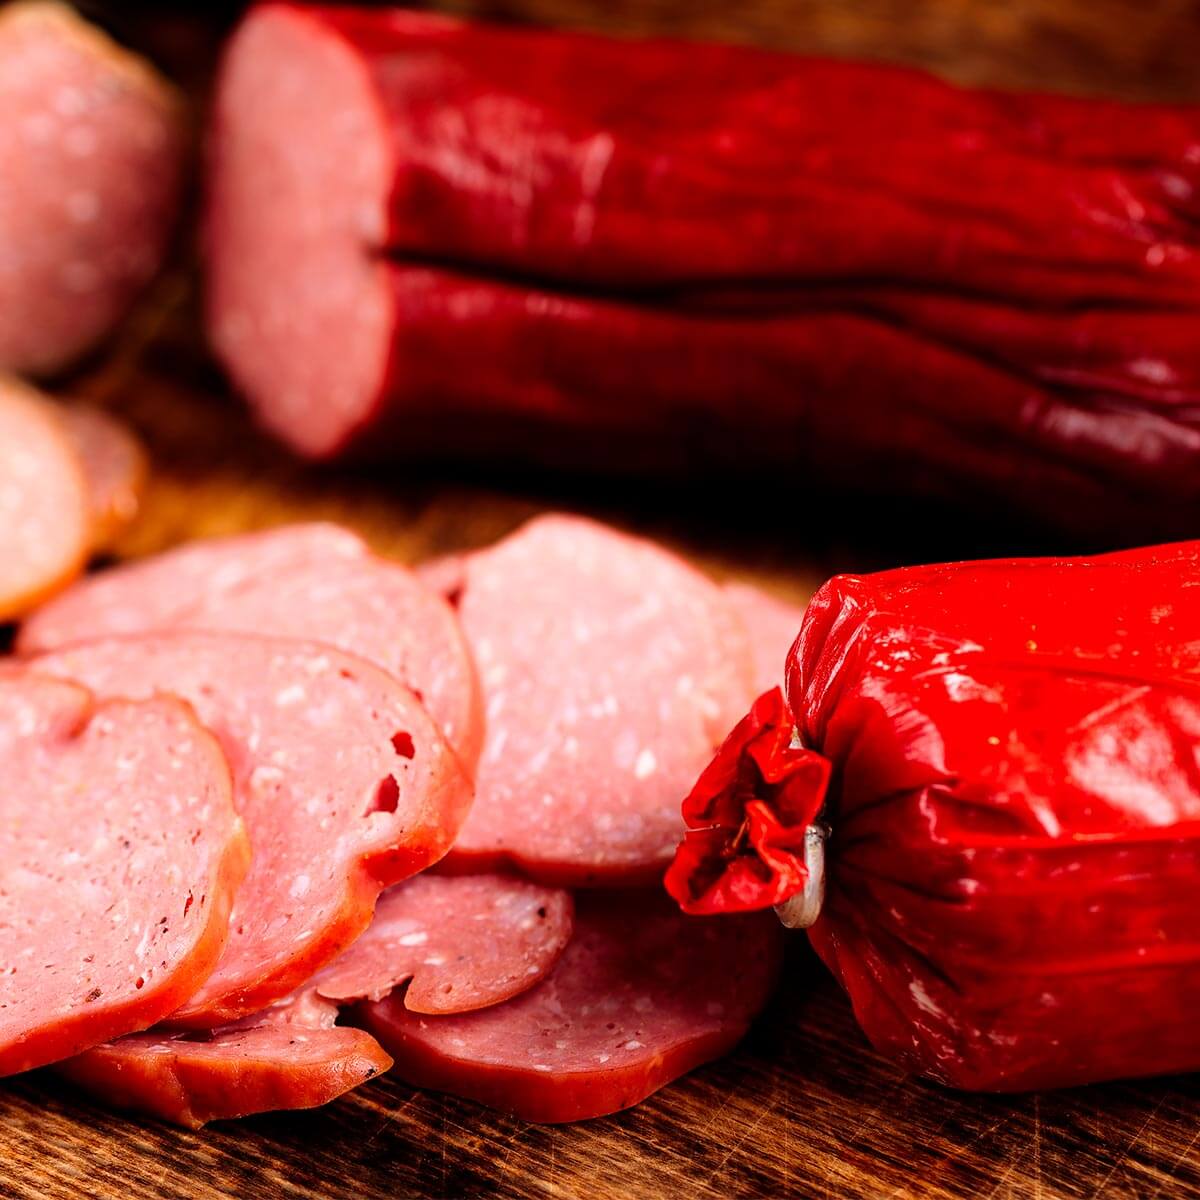
Nothing goes with a cold beer on a hot day quite like summer sausage and a hunk of cheese. Some people (including quite a few here at LEM) even add cheese to their summer sausage. But whether you like cheese on the side or cheese in your sausage, stuffing sausage is a great way to use venison. For the curious among you, we’ll touch on the history of summer sausage before stepping through a how-to on sausage making and finally, we’ll include a few of our favorite recipes.
 Summer sausage was a German innovation that was so named because it could be kept through the winter and spring into the summer months, even before refrigeration. That’s because traditional summer sausage is a semi-dry sausage that features three different types of preservation, a method that has been used for hundreds of years.
(Note: LEM Backwoods Cured Seasoning Blends, including Summer Sausage, do not have the preservatives needed to make a shelf stable sausage. Other ingredients must be used to lower the pH of the sausage so it will not need refrigeration. The method listed below is for semi-dry, shelf stable sausage. The Backwoods Summer Sausage Blend can be used as your base seasoning but other ingredients must be added to insure proper preservation.)
First, the curing salts (our LEM seasoning blends include these salts) get the preservation process started.
 Second, summer sausage is cooked either in an oven, or via our preferred method, in a smoker. Both cooking methods partially dry and completely cook the meat, helping to preserve the sausage. We like the smoky flavor, but not everyone has a smoker. Finally, traditional summer sausage contains lactic acid produced by the addition of sugar and lactobacillus bacteria, the same bacteria often used as starter in yogurt, cheese, sauerkraut, pickles, beer, cider, kimchi, and cocoa. This final process is called lactic acid fermentation, and while it inhibits the growth of bad bacteria, it also imparts that signature tangy taste you probably associate with many of the foods we just mentioned.
Here at LEM, we offer Encapsulated Citric Acid. This ingredient is used to lower the pH, dry the sausage and gives it that tang. Encapsulated Citric Acid can be used with any of the LEM Backwoods Cured Seasoning Blends to make a shelf stable sausage. Follow directions carefully and if you don’t care for the tang, add some Trehalose to help mask that flavor.
These three safeguards combine to create a semi-dry sausage that could be kept and eaten during the summer back before the advent of refrigeration. Since we all started using refrigerators, food preservation guidelines have evolved. We do suggest following the USDA recommendations, which state that semi-dry sausage like summer sausage can be kept up to 3 months unopened in a refrigerator, and 3 weeks after opening in a refrigerator. Now that we’ve covered that, we’ll follow brain food with stomach food and jump right into the sausage stuffing how-to.
After you’ve broken down your game into quarters and sliced up the steaks, loins, and rump, you’ll have lots of parts that make for good sausage. Shoot for an 80/20 percentage of lean meat to fat. We like pork fat because of its mild flavor, but feel free to substitute another type if you’d prefer. To make 10 lbs. of sausage, you’ll add 8 lbs. of meat to 2 lbs. of fat. Grind the chunks of meat and fat together and you’ll have the base for your sausage. You also don’t always have to use game meat. Ground beef or pork from your favorite butcher tastes great, too.
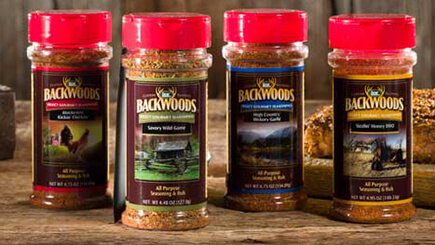
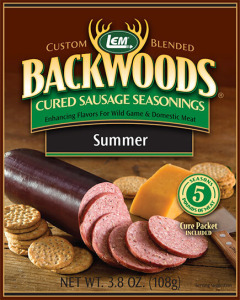
 Our Backwoods Summer Sausage Kits come with both seasonings and casings. Each kit has our Summer Sausage seasoning with cure, Fibrous Casings, string to tie the end, and directions, (in case you forget how.) You might also check out our Backwoods Jalapeño Summer Sausage Seasoning or our Backwoods Reduced Sodium Summer Sausage Seasoning. You can use your own blend of seasonings if you like, and we’ll link to some ideas for those below. And if you like cheese in your sausage, check out our High-Temp Hot Pepper Cheese. It stays in chunks up to 400 degrees and also comes in cheddar, swiss, and Habanero flavors.
 That meat won’t grind itself, and it sure won’t stuff itself into the casings. We’d recommend one of our Big Bite Grinders and a Mighty Bite Sausage Stuffer. You might also consider a Meat Mixer and a meat lug. The mixer makes stirring in those seasonings much easier. Saves you from those dreaded frozen fingers, too.
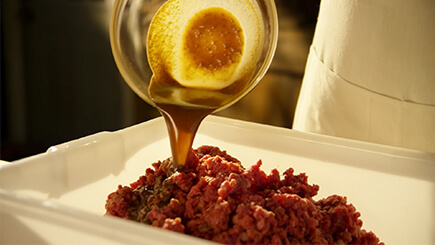
 LEM seasoning packets will specify how much meat to use, so once you’ve ground your meat, measure out the appropriate poundage for your seasonings. Our Summer Sausage packages come in 5 and 25 lb. sizes. If you’re using the 5 lb version/fat blend, add one packet of seasoning and the included Cure to 5 ounces of water, mix until dissolved, then mix the solution with your meat until tacky. The water ensures even distribution of the seasoning in the final product, so make sure you complete that step. If you plan on adding cheese, do it now. We love our hi-temp cheddar cheese with our jalapeño summer sausage seasoning, but feel free to try other combinations.
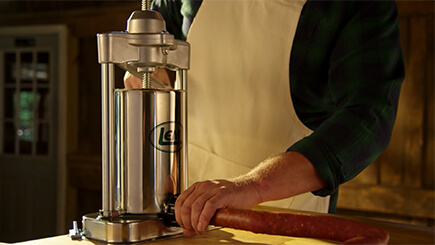
Press the meat into your sausage stuffer, being sure to push hard enough to force out any air pockets. Attach your fibrous casing to the sausage stuffer nozzle and crank the sausage stuffer to fill the casing. Stuff the casings tightly but do not overfill. Overfilling may cause bursting of the casing during the cooking process.
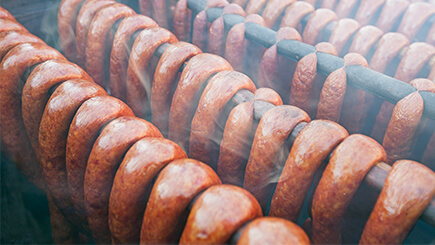
Once you’ve stuffed the sausage and sealed the ends, roll them back and forth to remove any air inside. Let the sausage rest overnight in your fridge so the flavors can mingle. The next day, you’ll want to cook in either the oven or smoker. For an oven finish, preheat the oven to 185°F. Place room temperature sausage in the oven and bake until internal temperature reaches 165°F. Remove and cool. To finish in a smoker, preheat the smoker to 145°F, open the dampers, place room temperature sausage logs into the smoker and dry for the first hour. Then turn the smoker up to 180°F, add your wood chips and smoke for 2-3 hours. To finish the sausage raise the temperature to 185°F, add water to your smoker, close the dampers and cook until the internal temperature measures 165°F. Remove and cool. For a fast cool down, place your sausage logs into cold water for five or ten minutes to drop the temperature and stop the cooking. This will also minimize the wrinkling of the casing, making your casing skins more appealing.
Refrigerate or freeze the finished product. The next time you’re in the mood, break out the summer sausage, pour a cold one, and enjoy!
For some different takes on seasoning blends, try some of the recipes below. Just make sure to let us know which ones you prefer.
Homemade Summer Sausage - Genius Kitchen
Venison Jalapeño-Cheddar Summer Sausage - Outdoor channel
Step by Step Summer Sausage - Taste of Artisan
Gramps’ Venison Summer Sausage - allrecipes.com
Smoked Summer Sausage - Just a Pinch Recipes
Making tamales doesn’t have to be a scary thing but having multiple people will make the assembly go much faster.
Venison and chive pot sticker recipe is a household favorite when it comes to entertaining guests.
To most people, sauerkraut may seem like a daunting task that requires superior culinary skills, but it's quite the opposite. All that you need is...