We are never short of tips that's for sure. LEM brings you the best of the best tips on grinding, jerky & sausage making, using our burger press, collagen, and more.
Grinder tips
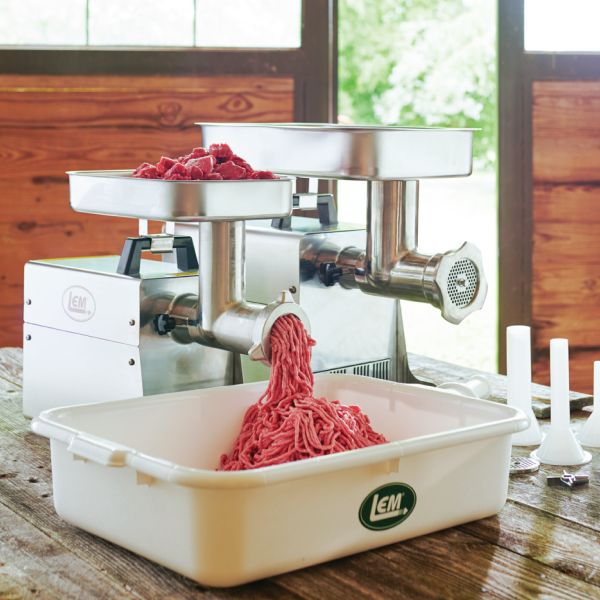
- Use LEM's Ground Meat Packaging Systems in conjunction with your LEM Grinder for efficient freezer storage of your game.
- LEM Grinders are commercial-grade. They can grind between 160 lbs/hr (#5 Unit) and 360 lbs/hr (#12 Unit) but meant for home-use.
- A word about Wattage: Wattage is relatively meaningless when comparing grinding capacity. Torque; a product of the gearing and the motor RPM, is the key factor in a grinder’s power. We have found 1,000-watt grinders with less power than our smallest grinder model.
- Cleaning is important! Be safe. Make sure to clean your grinder and all your Game Processing equipment thoroughly. Use hot water, soap, and a brush to reach nooks and crannies.
- If the meat is “mashing” and does not come out in strings during grinding the grinding knife may be dull. Change grinder plates & knives simultaneously for optimum performance.
- You can always call LEM at 1-877-536-7763 to re-order plates and knives for your grinder.
Sausage Making Tips
- Soak the Fibrous Casing and Natural Casings for 30 min before using. Collagen middles need to be soaked in Saltwater.
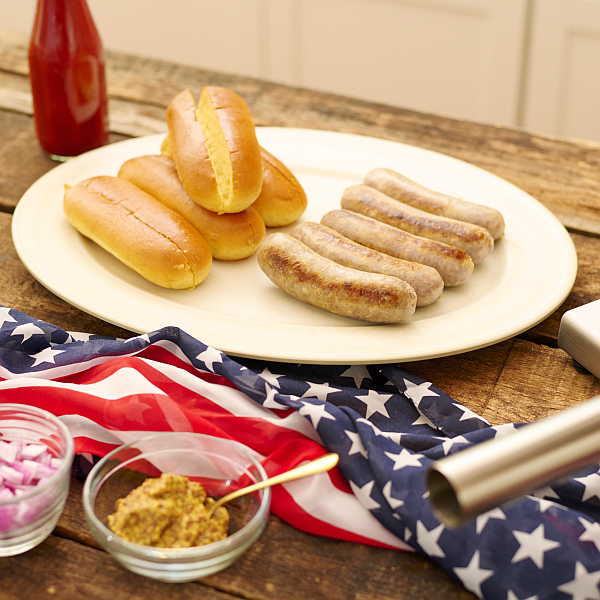
- Fill your casing with meat. 5lb stuffer works great. However, you can also use the LEM Cannon to stuff sausage when you buy the sausage nozzle.
- Check for nicks in your casing before filling.
- Use a pin to remove an air pocket in your filled casing.
- Use hog rings and pliers to close both ends of your sausage casing.
- Once your meat has been ground, seasonings must be blended with the meat before you load it into a sausage stuffer. Meat Mixers make quick work of this process; evenly blending the seasonings in half the time a person could mix by hand.
- Add 1 oz. of water per 1lb meat when mixing sausage meat before filling your casing.
- How to Smoke the Perfect Sausage
- Need help deciding which Casings to use? Click here for our Casings Chart
- Trouble with Casings? Click here for Troubleshooting Casings
Jerky Making Tips
- LEM Cannon or Gun is the easiest way to make jerky. Jerky can also be made by cutting and marinating the meat. Place the meat on a LEM Rack & Pan to cook at low heat in your own oven or in a LEM Dehydrator.
- When slicing jerky from cuts of meat, always cut the strips with the grain. This allows you to bite into the meat across the grain when eating.
- Homemade jerky or sausage must be frozen after two weeks. This is because there are no chemicals or preservatives like you would find in store-bought jerky or summer sausage.
- A word about Cure and its use: Jerky making or smoking of meats involves cooking at lower temperatures (at or below 160 deg). Cure is a mixture of salt and sodium nitrate. It will reduce the incidence of botulism and other bacteria that can result from low-temperature cooking. Cure also enhances the color and flavor of the meat.
- Backwoods Jerky Seasonings come with a cure packet so there’s nothing else to buy. Easy to follow directions are on the back of each package.
Burger Press Tips
- The press can be adjusted to any thickness up to 1”.
- Place Satin Pac Patty Paper between the burgers in the press. This will prevent patties from sticking together when frozen.
- Use Backwoods fresh sausage seasoning (Chorizo, Cajun, or Sweet Italian) for a great “Sausage Burger".
Freezer Wrapping Venison to Maintain Nutrients and Flavor
After you’ve processed your deer into desirable cuts, it is imperative that you properly wrap and freeze the packages. Putting the cuts into plastic freezer bags will not guarantee you succulent, nutritious meat in the months to come. The most effective way to freezer wrap items is to use a quality freezer paper that is waxed or poly-coated on one side. The coated side of the paper should go against the meat. To optimize the protection, you can fold a freezer sheets around the meat and then properly freezer wrap. When I was processing, customers used to tell me that they had kept venison frozen for over 2 years and it was still excellent when cooked. That was because we properly wrapped the cuts when we processed the deer. Improper freezer wrapping or inferior wrapping supplies can cause “freezer burn”. This is a condition that robs the meat of flavor and nutrients. When the air is captured inside the package it causes the meat to turn gray or white. The dehydration caused by the refrigeration produces the freezer burn and the meat becomes dry, tasteless and lacks the proper nutrients. Any time you wrap items for the freezer, be sure to eliminate all the air from the package, and have no holes in the wrapping material. There are basically two methods of freezer wrapping with paper—the butcher wrap and the drugstore wrap. Of the two methods, the drug store wrap is more efficient if properly done. Both methods are shown in detail on my videos, Deer Processing From Field to Table and Deer Processing II: Boning the Deer Carcass. You also can click on the link below to view detailed instructions for both methods of freezer wrapping.
Whenever possible, do not stack freshly wrapped meat in the freezer. Lay the packages out in single layers until thoroughly frozen then stack them. It will be easy for you to rotate packages and use the oldest packages first by marking and dating them before freezing.
COLLAGEN MIDDLES
COLLAGEN MIDDLES ADVANTAGES:
- There are no loose casings after cooking or hanging in the cooler.
- The high protein collagen casing attaches to the meat.
- Collagen middles accept smoke easily for additional flavor and color.
- Collagen casings just look good on sausage. They are perfect for the unique product that you are trying to achieve.
- Collagen middles are very easy to work with as the high protein helps to eliminate “fat-out”.
HOW TO USE COLLAGEN MIDDLES:
- Soak casings in warm salt water.
- Dissolve ½ cup of non-iodized salt to 1 quart of water.
- Place casings in the water for 3 - 5 minutes. Do not over soak, the casings will continue to take on water and make them fragile.
- Stuff casings tight to the touch, clip or tie. Avoid air pockets; they could cause expansion and/or possible bursting.
- Bursting could also be caused by cooking and drying too fast at too high of temperature.
- Cooking
- If you make a fermented sausage, do your regular fermentation.
- After fermentation, dry to tacky. Smoke at around 140 to 145 degrees to for 1 hour. Raise the temperature in the house to 160-170 degrees with 30% humidity for 2 hours. This is when you add your soaked chips or dust. Then finish at 180 degrees with 60% humidity (by adding a pan of water to the burner) to reach your desired internal temperature (165º).
- Shower or water bath for 20 minutes for a full tight casing and to help eliminate wrinkling
A little time and patience can give excellent results.